| Van De Graaf Generator |
 |
 |
 |
 |
 |
 |
 |
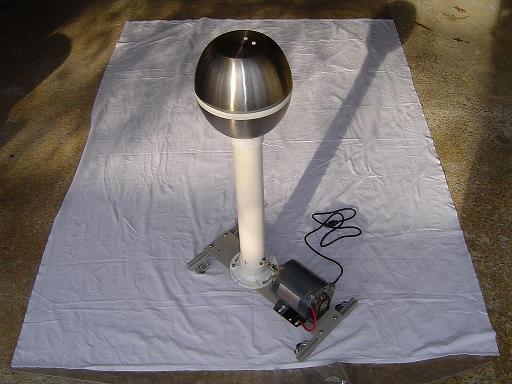
| Overview: Simple Van De Graaf Generator built with commonly accessible parts. Uses PVC top roller and Nylon bottom roller to negatively charge the sphere contrary to most commercial generators which positively charge the sphere. |
||
Principle: When a VDG is run, the belt touching the bottom roller induces an positive electrostatic charge on the roller due to the forming and breaking of polar bonds. This electrostatic charge ionizes the air between the roller and the brush. The negative charge from the ions is deposited on the belt and the positive ions are neutralized by the grounded bottom brush. The negative charge is carried to the top of the generator where it is repelled by the negatively charged top roller onto the top brush. Due to shell theory, electric charge is distributed on the outside of a conducting shell, therefore the inside of a sphere on a VDG generator has no electrostatic potential. Thus when the charged belt enters the sphere it's charge is transferred to the outside of the sphere with no repulsion. This principle allows the charge to increase on the shell of the VDG until it is limited by inducing ionization in the air. |
||
| Construction details: Step by step documentation of Van De Graaf generator construction. |
||
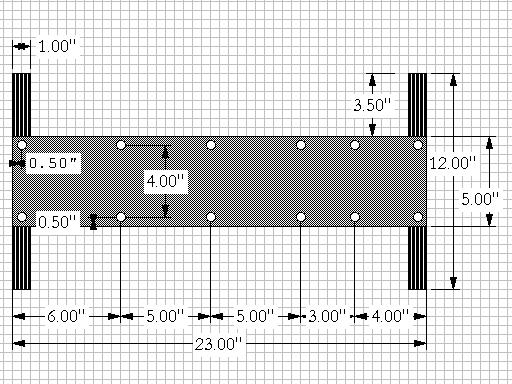 |
VDG base plate CAD: In the Cad design , the main plate is 3/8" thick aluminum, and the holes drilled in it are 1/4". The black parts are 8020 1010 extrusion. Economy t-nuts and 1/2" 1/4"-20tpi bolts were used to attach the 8020 to the main plate. |
|
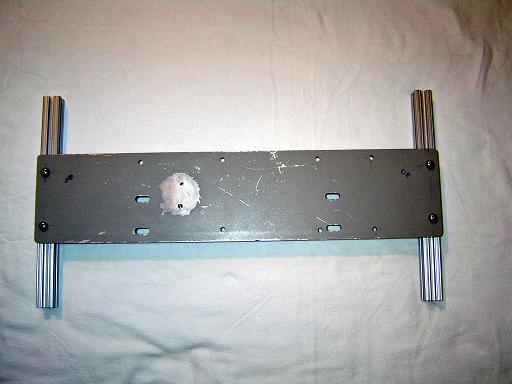 |
Base Plate:
Base plate is 3/8" aluminum(gray). Holes are 1/4" Support bars are 8020, 1010 extrusion. |
|
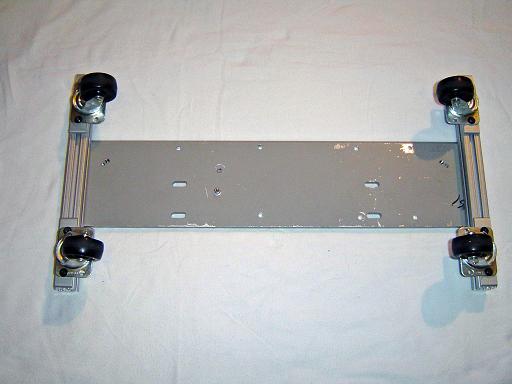 |
Wheels: Castor wheels (not shown in this CADs) can be attached to the bottom allowing the VDG to be easily transported. |
|
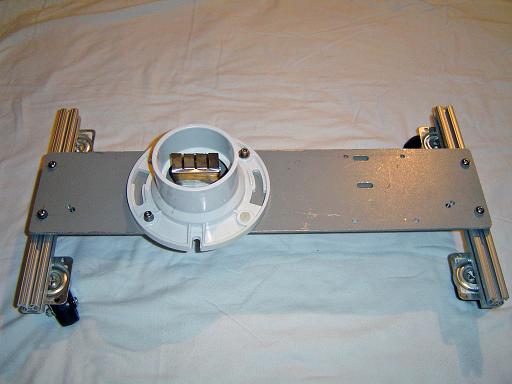 |
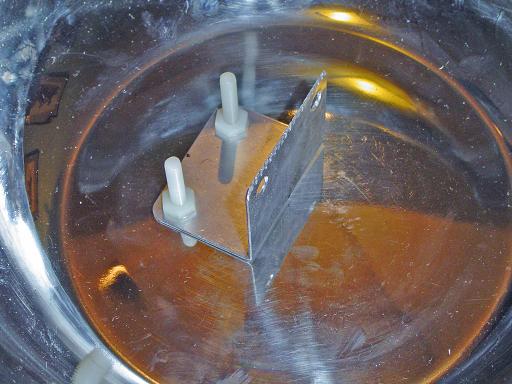
Bottom Flange: The mounting flange is a PVC closet flange with a 3" pipe socket and a 5"x4" bolt pattern for mounting (buy at ACE). Mount the bottom brush to the aluminum plate and ground the plate. |
|
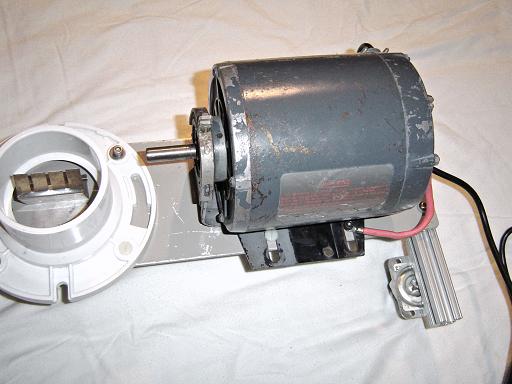 |
Motor Mount: Most motors have a standard 3"x4" bolt pattern for mounting, however if the particular motor you are using has a different bolt pattern for mounting, take note of it and drill the motor mounting holes in the aluminum plate as such. |
|
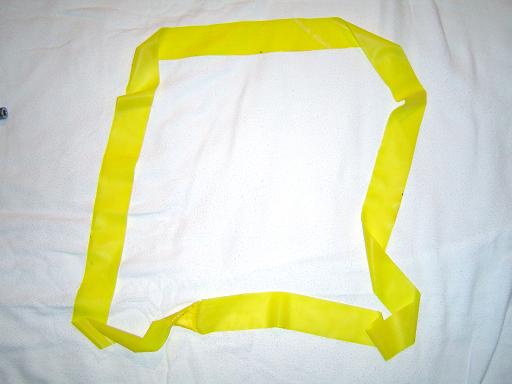 |
Belt: The belt should be made of any non-conductive rubber and should be as thin as possible. "Dyna-Band"(red type) or other types of exercise bands usually work well. Cut the band to be 56" long and 1.5" wide. Use rubber cement to glue the band into a loop. When gluing the band use about 1.5" of overlap. NOTE: be careful, the bands sometimes curl when the rubber cement is applied so it should be stretched a little and taped down. Your belt should be on your roller assemblies before the shaft collars are attached. |
|
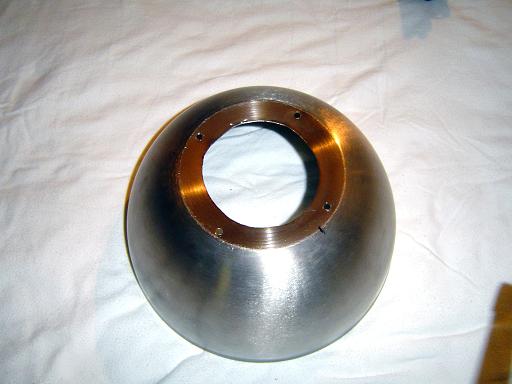 |
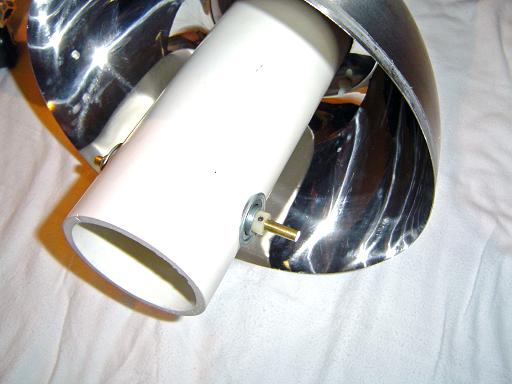
Bottom Hemisphere: The sphere is made out of two 10" diameter flat bottom mixing bowls. You will have to cut of the top lip (Use a dremmel router attachment and reinforced cut off wheels) on both bowls. The bottom bowl should have a 3.25" diameter hole cut in it (Use a dremmel and reinforced cut off wheels). |
|
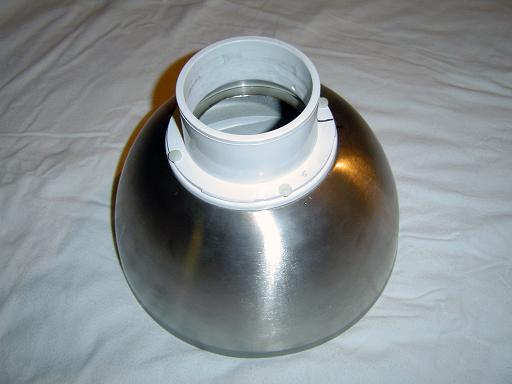 |
Bottom Hemisphere: Once the hole is cut attach the bottom bowl to a 3" pipe flange (Plastic part of a rotatable closet flange) with 6-32 nylon screws. And slide the bottom half of the sphere onto the PVC pipe. |
|
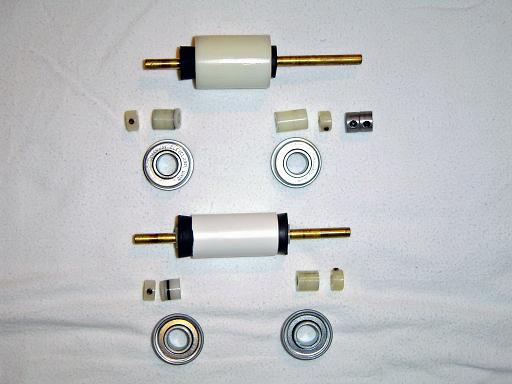 |
Rollers: The bottom roller is a 2" long, 1" OD nylon pipe with a 1/2" ID hole drilled down the center. Two #1 rubber stoppers with 1/4" holes drilled down the center are press fitted into each end of the pipe and a 1/4" shaft is inserted through the holes. |
|
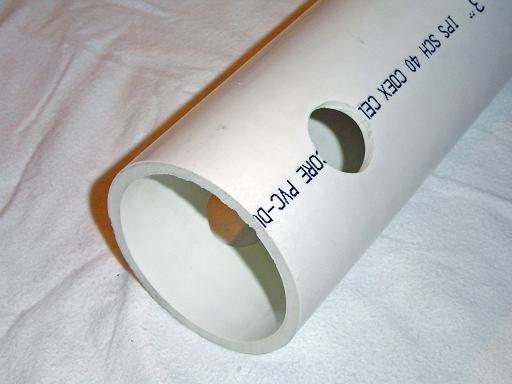 |
Body Tube: Four 1&1/8" holes are drilled in the PVC pipe. Two holes on each end, 2.25" from the end of the pipe (all holes are parallel). |
|
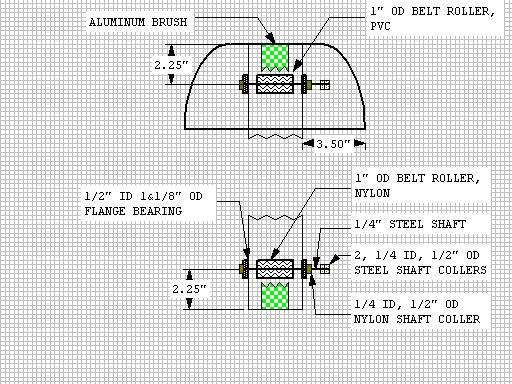 |
Roller Cad: The roller assembles (top roller should be PVC and similar in design to bottom roller except with different size stoppers to match the ID of the PVC pipe) are then inserted into the bearings. |
|
 |
Bearing Mount: 1/2" to 1/4" spacers are inserted until they center the shaft in the bearing assembly. |
|
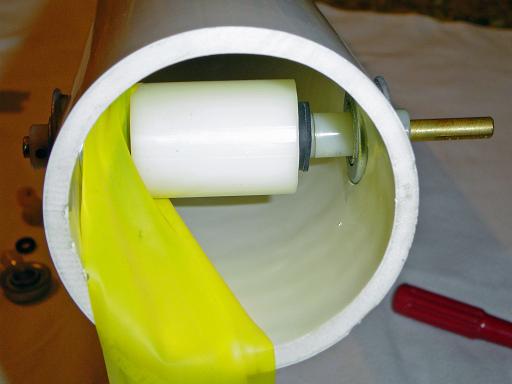 |
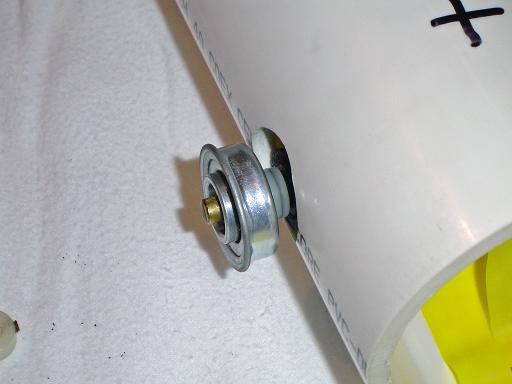
Bottom Roller: Four 1&1/8" OD, 1/2" ID flange bearings (buy at ace, they don't sell 1&1/8" OD, 1/4" ID flange bearings although that would simplify the design) are press-fit into each of the holes, securing the roller. |
|
 |
VDG Top: 1/4" ID 1/2" OD nylon shaft collars (important so they expand) are inserted into the bearings just far enough to tighten the setscrew. When the setscrew is tightened the nylon collar elongates locking to the bearing and the shaft. Optionally if you can't find nylon collars you can use a metal collar but would have to find some 1/4" ID 1/2" OD spacers to center the roller. |
|
 |
Top Brush: The top brush should be attached with nylon screws and should be as close to the belt as possible (not touching). |
|
 |
Motor Cad: Motor is connected to bottom roller. |
|
 |
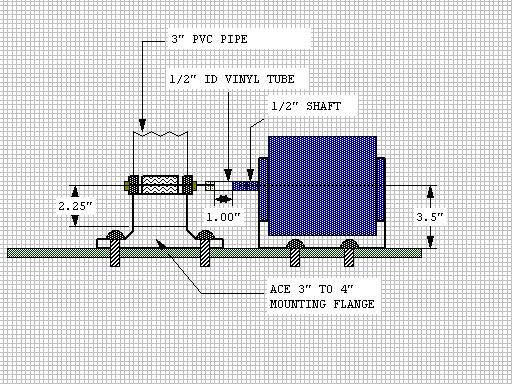
Motor Connection: Attach two 1/4" ID 1/2" OD steel shaft collars to the end of the roller shaft. Slide a 1/2" ID clear soft vinyl tube over the motor drive shaft and the shaft collars at the end and secure the tube using hose clamps. This makes a flexible coupling and should help take care of any small misalignment. |
|
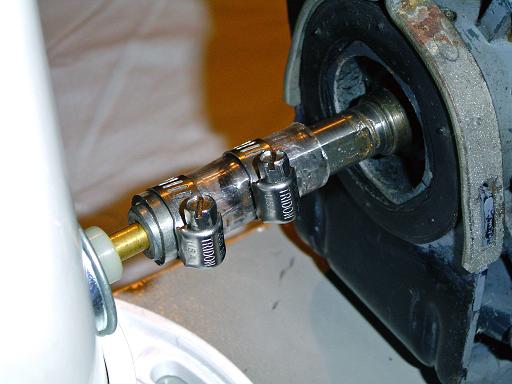 |
Motor Connected: Slide the tube over the steel shaft collars on the bottom roller and tighten the hose clamps over both the motor shaft and the roller axle. |
|
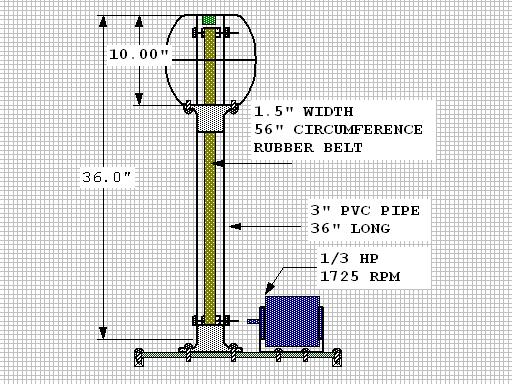 |
VDG Cad: Side view of constructed Van De Graaf generator. |
|
 |
VDG side view: The electrical tape coverers the intersection between the two shells to prevent corona losses to the air, allowing the charge to build up to maximum potential. Any sharp point or edge will contribute to charge losses, this is why the screws attaching the top brush to the dome are nylon along with the screws that attach the bottom dome to the flange. The flange covers up the bottom lip of the bowl where the hole for the pipe was cut, minimizing losses. |
|
By attempting to reproduce any experiments or devices listed on this domain in part or in whole, you agree to hold me harmless against any lawsuit or liability. Copyright © 1998 - 2005 by Andrew Seltzman. All rights reserved. |
|
| Contact me at: admin@rtftechnologies.org | |